Presidential Detailed: Can you say Keving Brown Method? :)

PresdntialDtail

New member
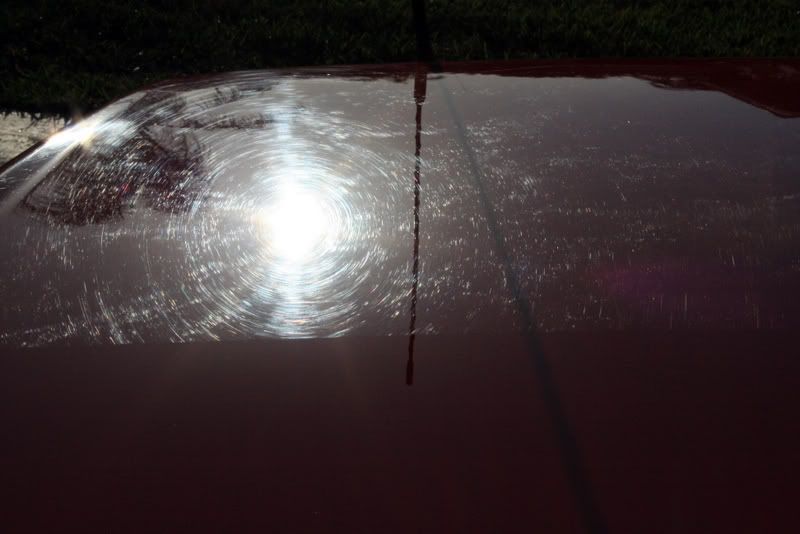
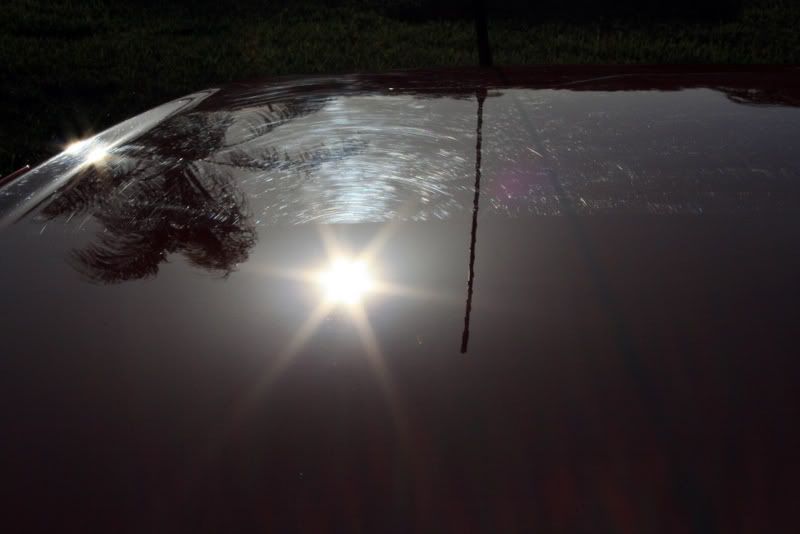
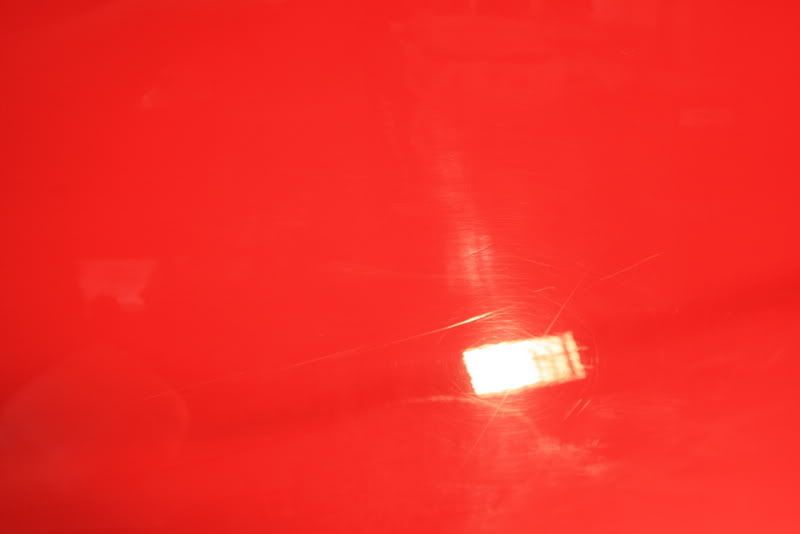
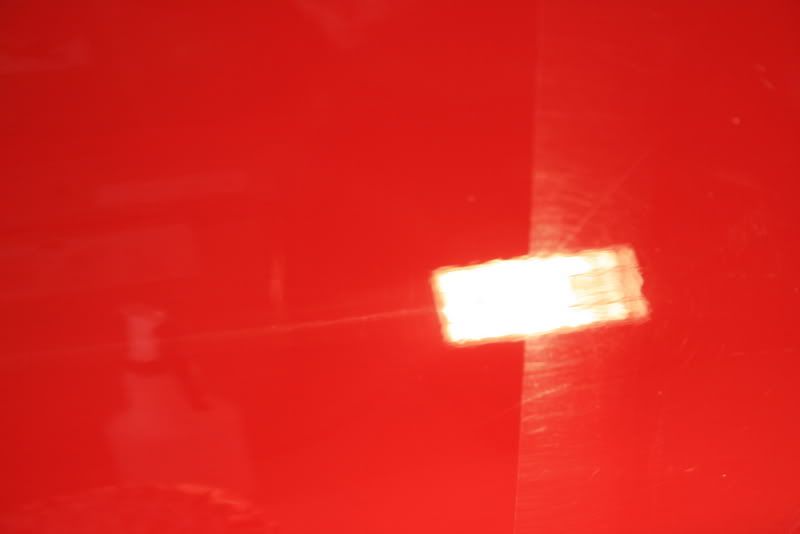
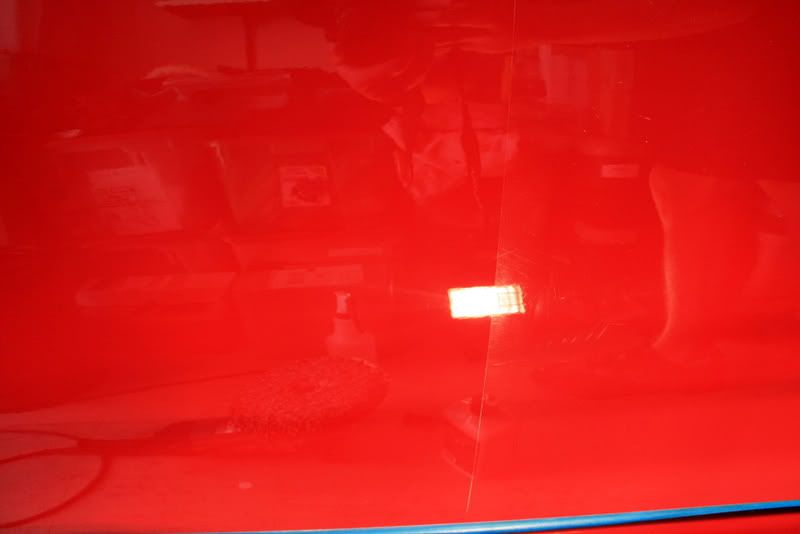
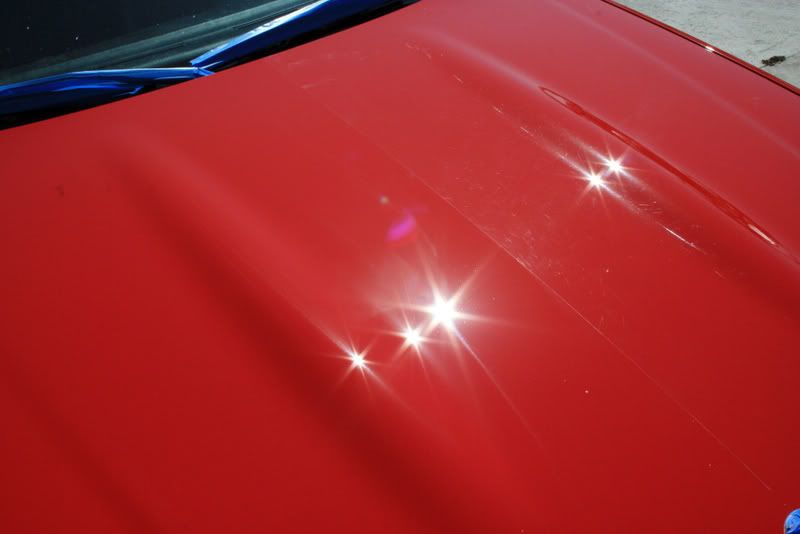
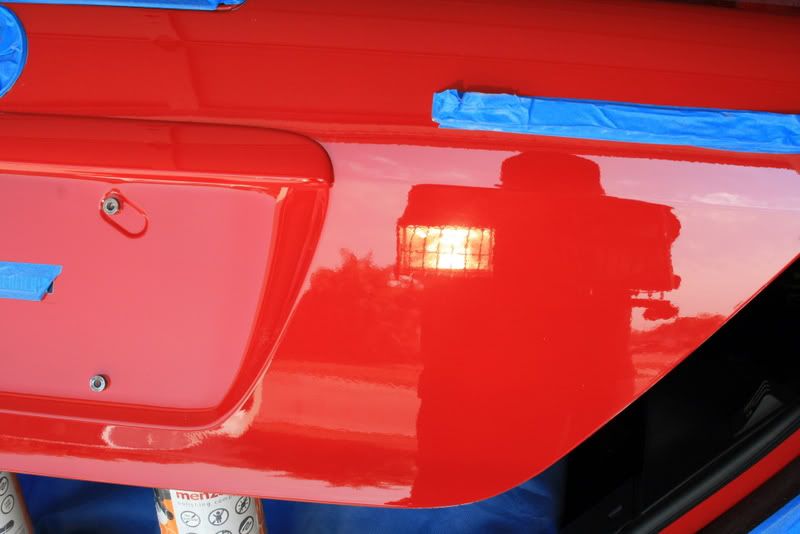
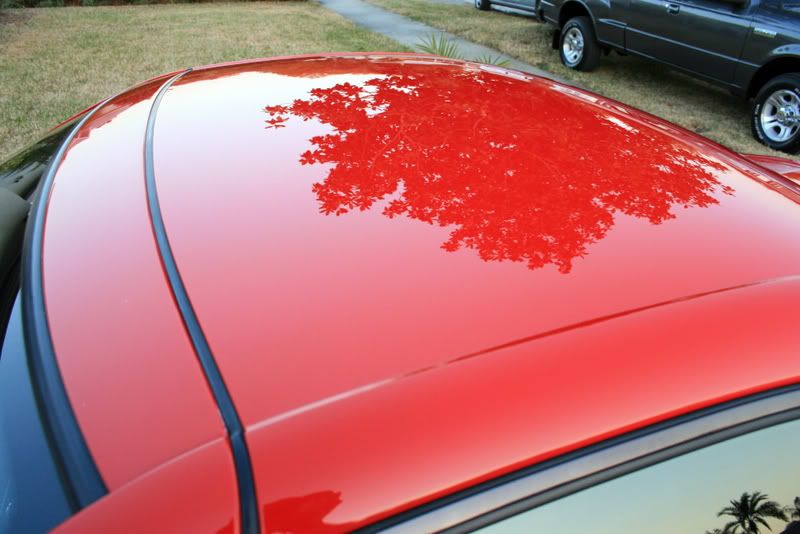
With all the Kevin Brown craziness/hype going on, I thought I would make a nice thread showcasing the results you can achieve using his method using a rotary which is slightly different from his method with the foam pads. I have been working with Kevin for the past couple weeks trying to perfect this method, now I just need to get a DA so I can finish it off! For some reason I have not been able to get a ZERO hologram finish using my rotary and M205 or M105 on a finishing pad. I spoke with both Kevin Brown and Jason Rose today on the phone, thanks to Kevin once again for the contact. The first thing Jason pointed out was that I was not using the new Soft-Buff 2.0 Finishing pad which M205 was specifically designed around and apparently does not play well with others UNLIKE M105. Not even other Megs pads, I was using both the Soft-Buff(non- 2.0) Yellow and Tan and could not get the desired results I was looking for. I even tried both M105/205 on black Lake Country Finishing pads with even worse results. I was running out of time to experiment with my new bottle of 205, so I ended up finishing with 3m Ultrafina on a 3M UK Finishing Pad. I will be purchasing some more 2.0 pads and give it another shot. Once I get my DA, I am positive I will have a better experience as well. WARNING: If you are not open to learning new skills, please press the back button on your browser. :hide:


What I have learned:

-Kevin Brown IS THE MAN!

-The KB method DOES INDEED WORK! AND VERY WELL!

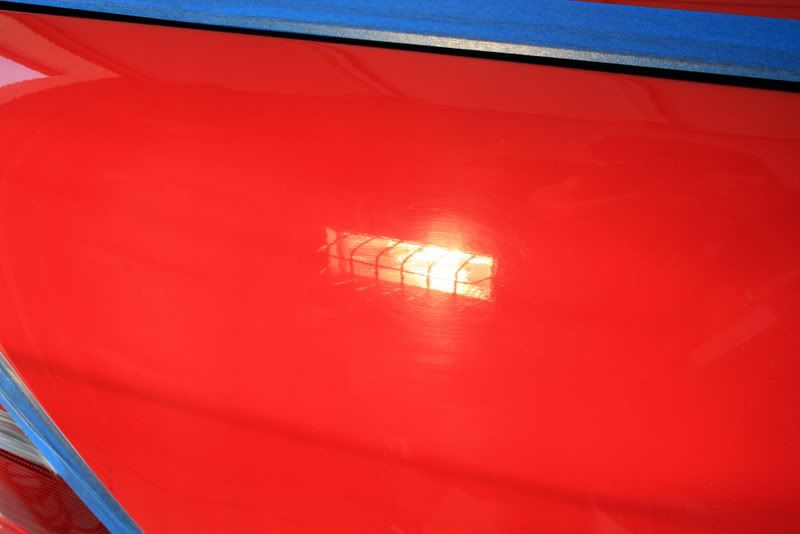
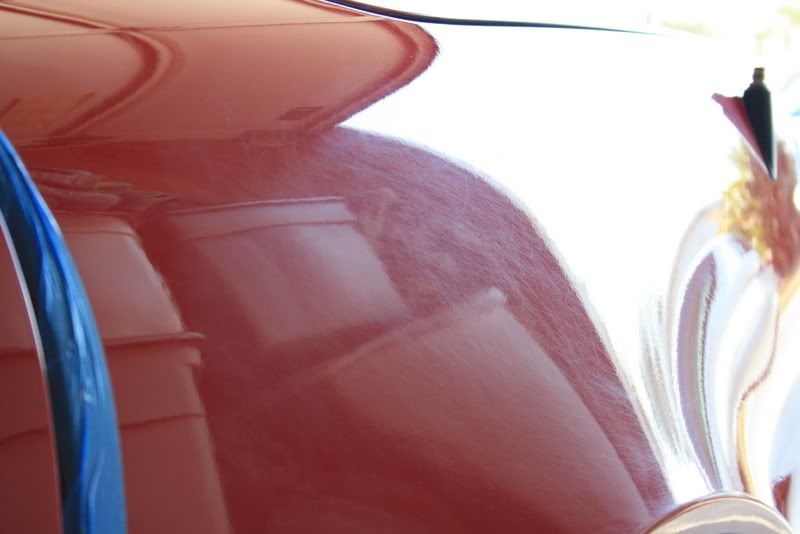
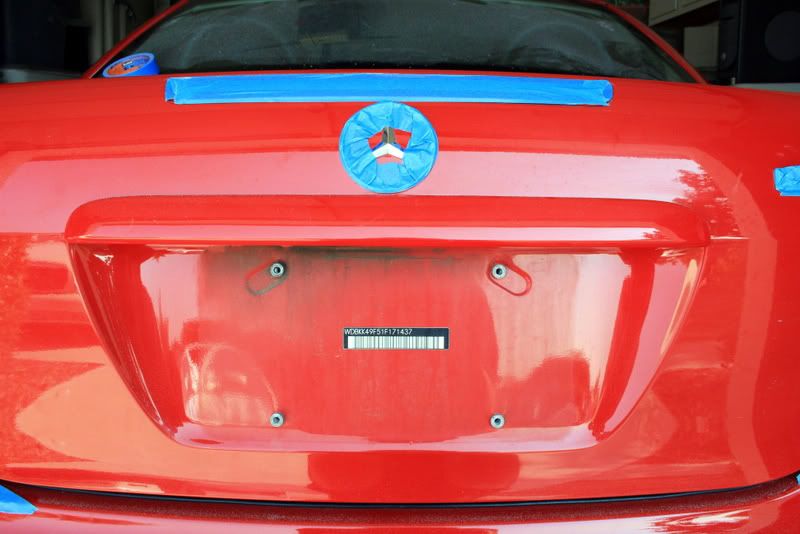
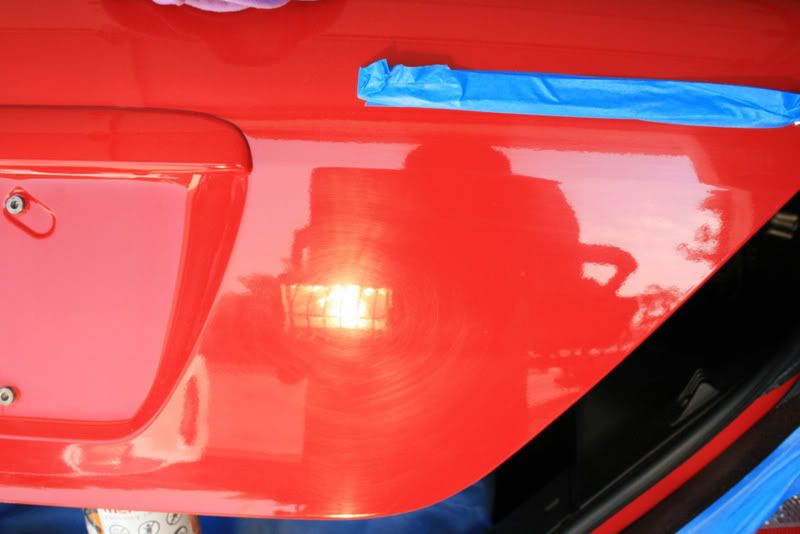
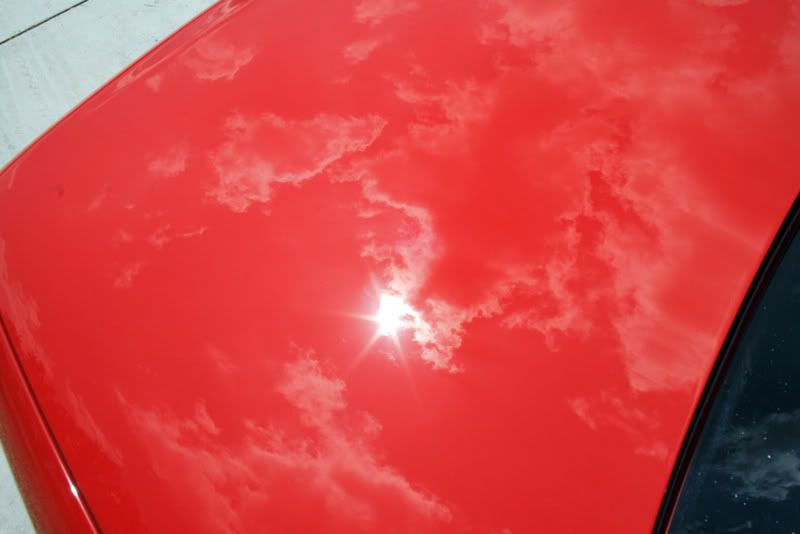
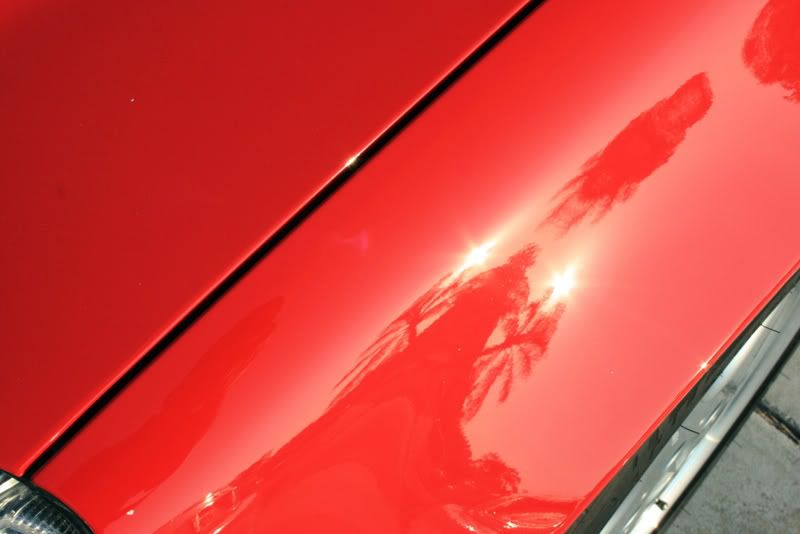
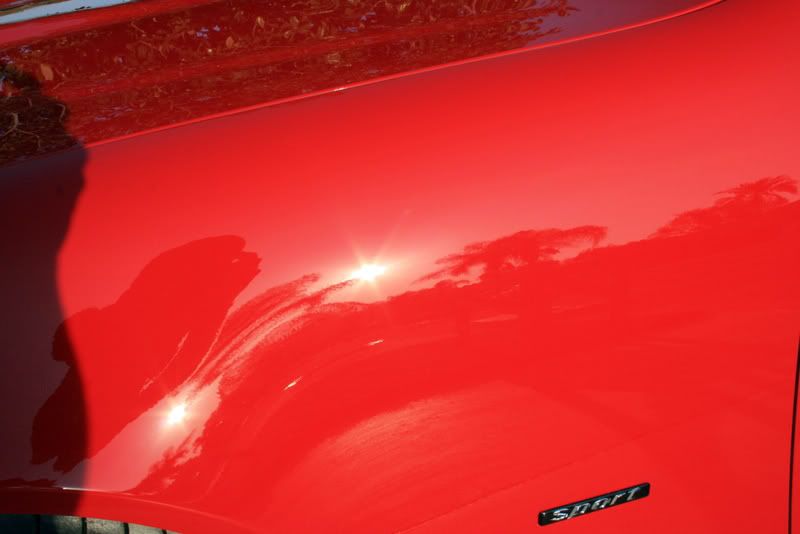
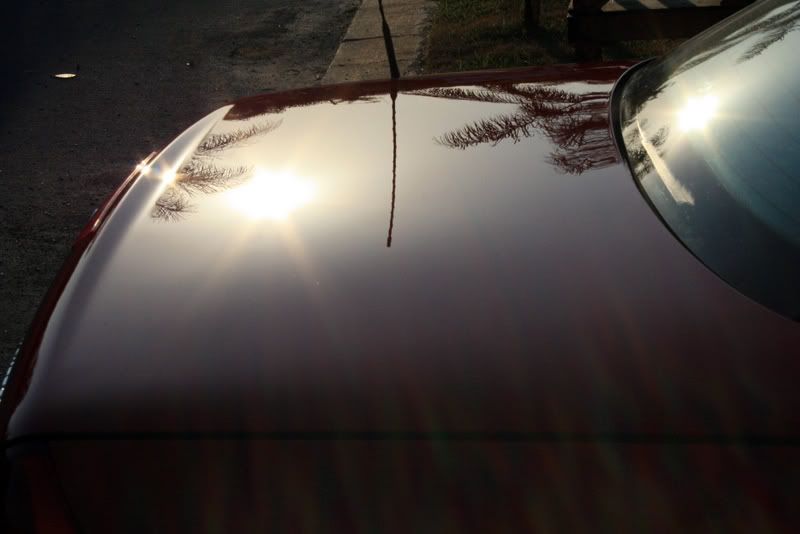
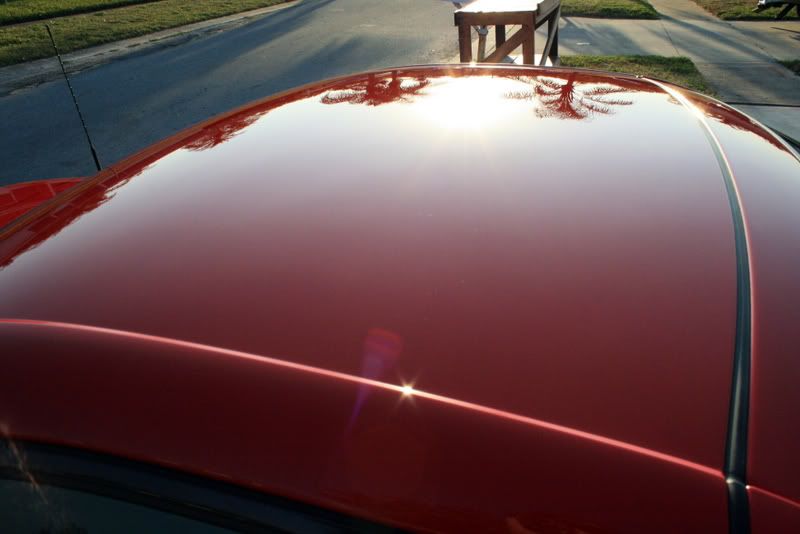
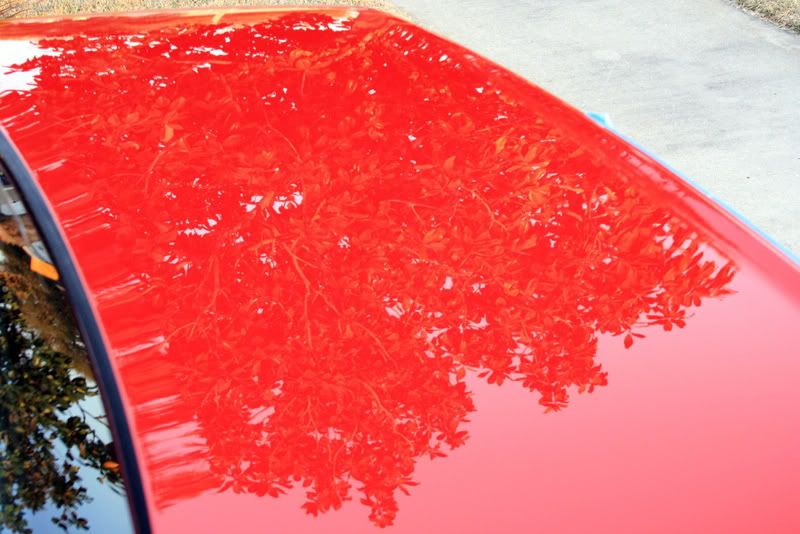
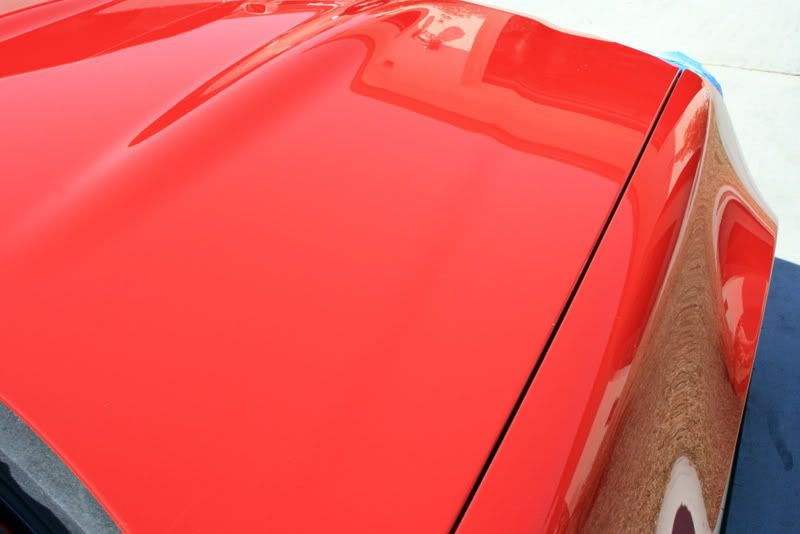
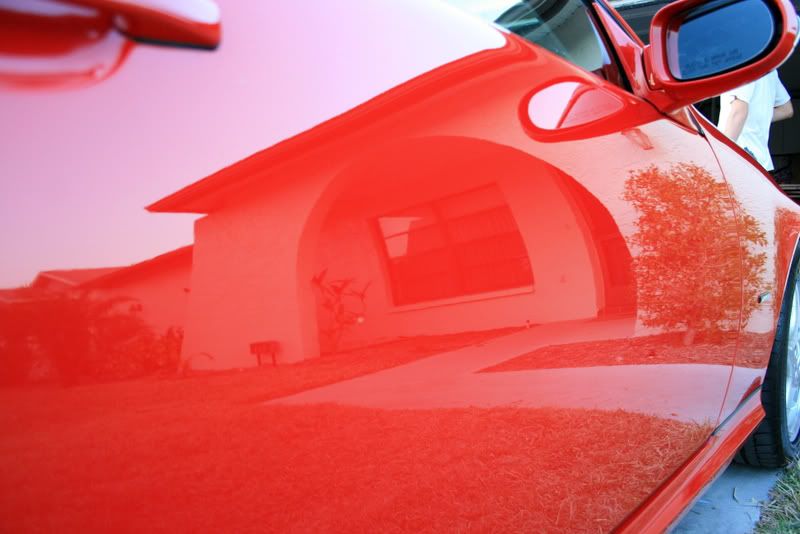
-You can almost get LSP ready results even using a heavy wool pad, of course this is dependent upon the paint, but even on the softer paints with a foam cutting pad you can achieve great cut and an even better finish!

(my new favorite is the Megs Soft-Buff 2.0 Burgandy FOAM)

-M205 apparently is pad temper-mental. Im going to give it another go with the new pads and hopefully Ill get me G110 this week as well!

-Kevin Brown IS THE MAN! :)


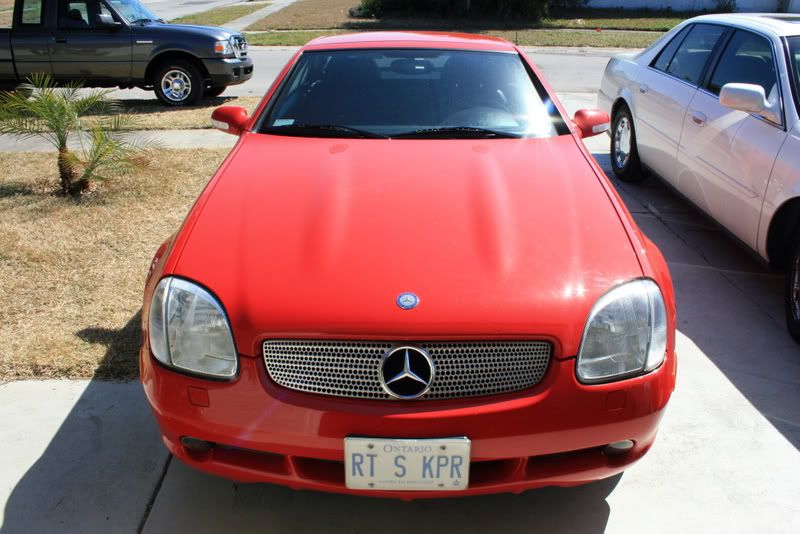
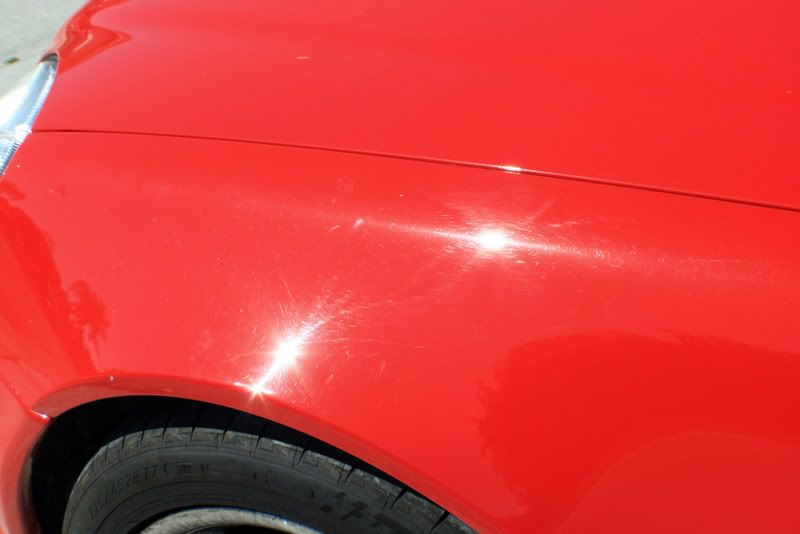
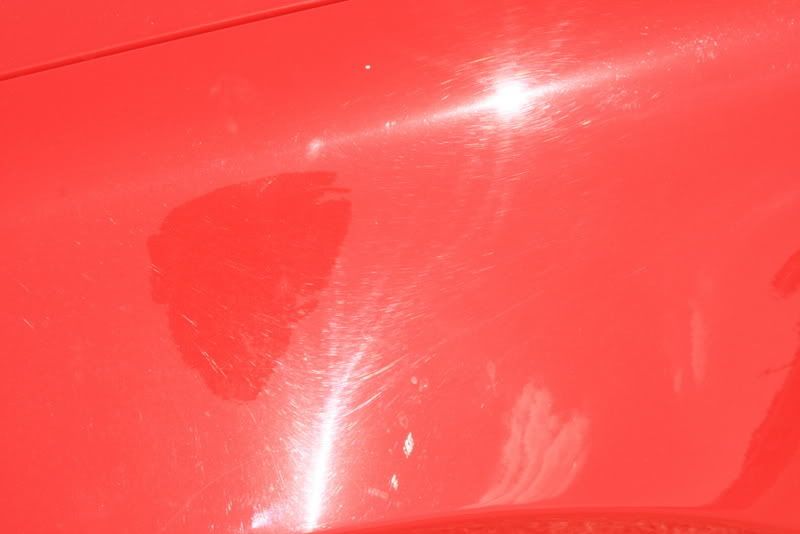
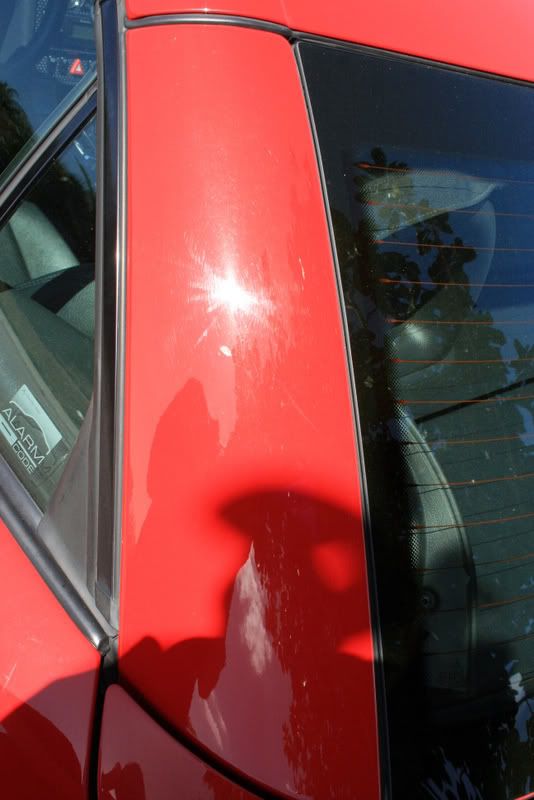
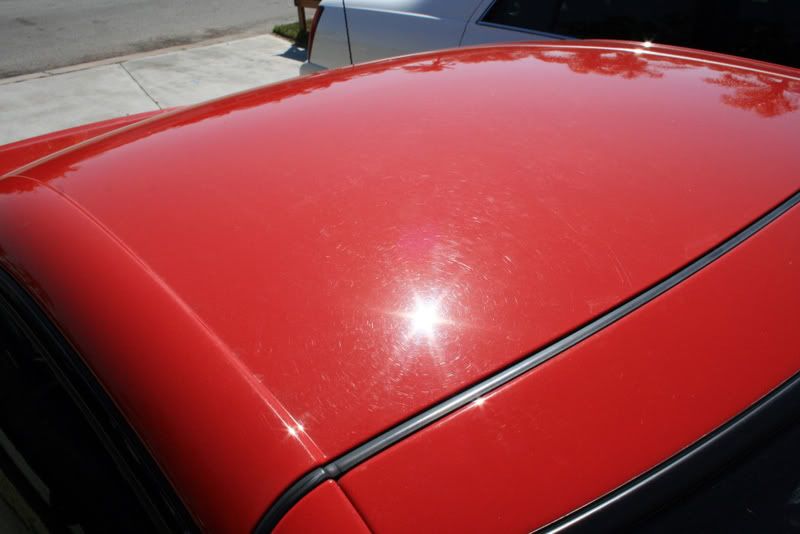
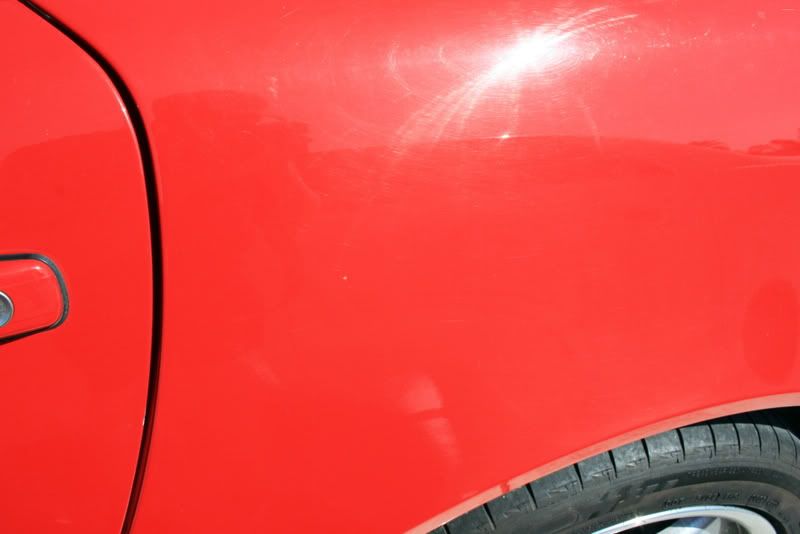
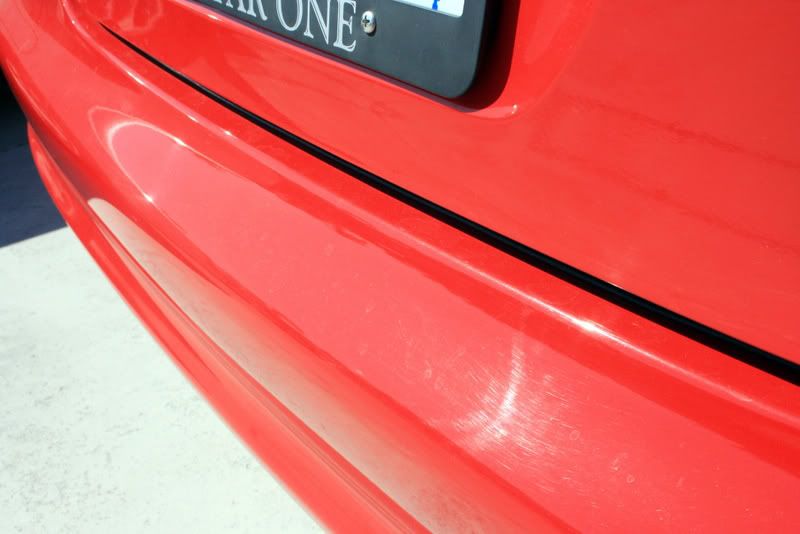
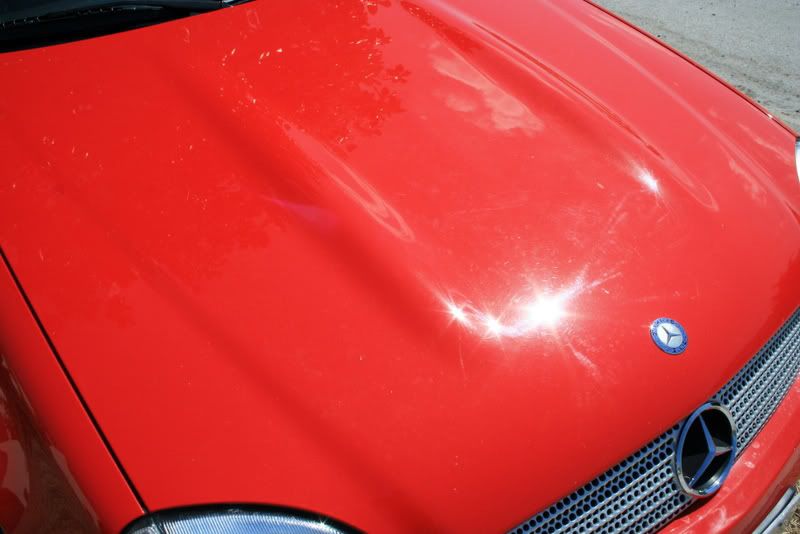
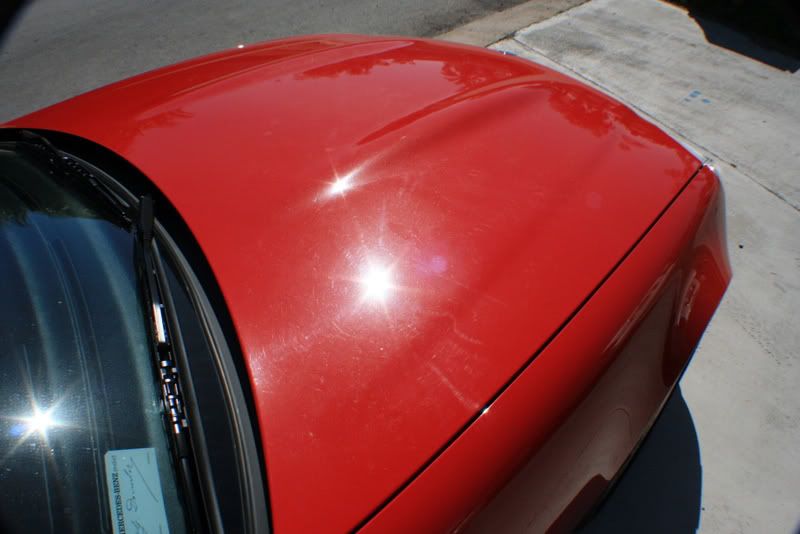
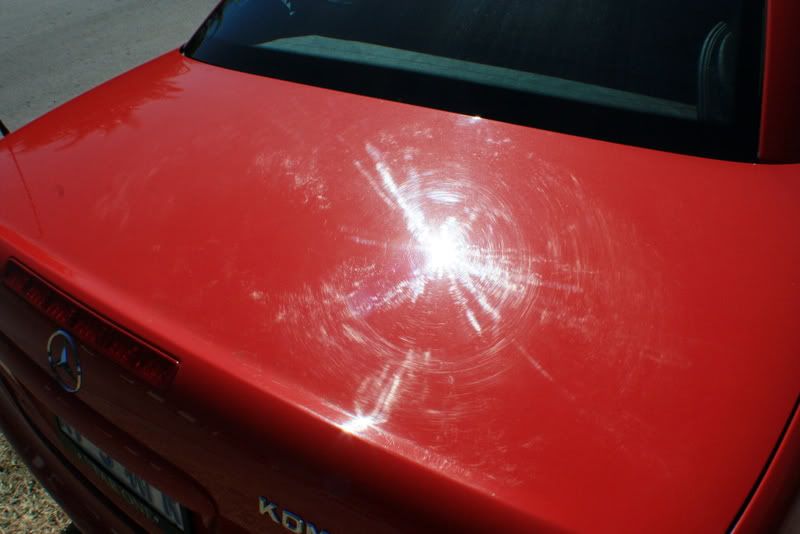
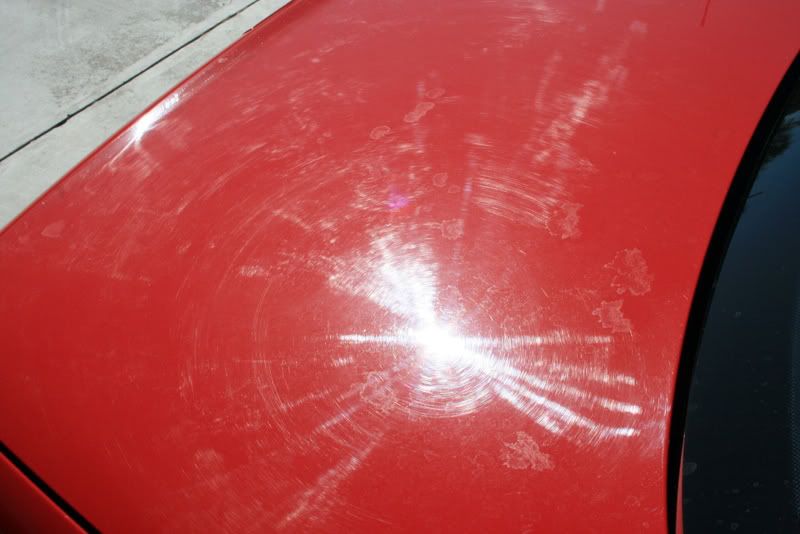
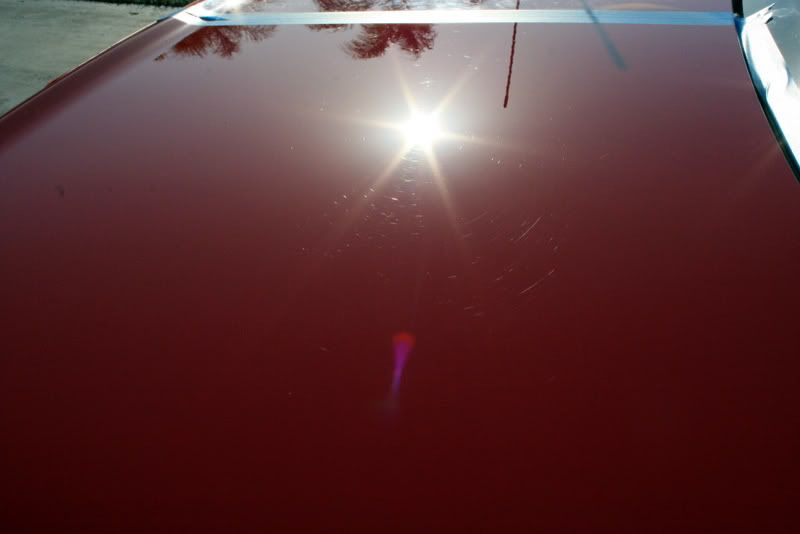
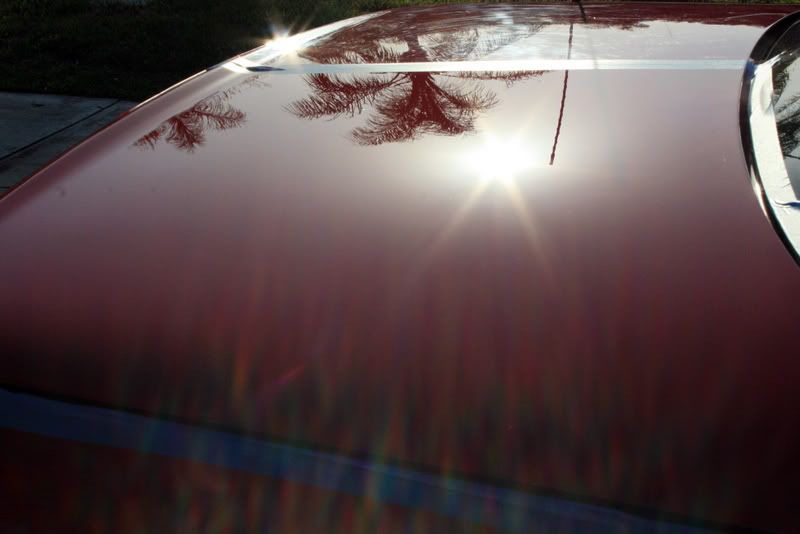
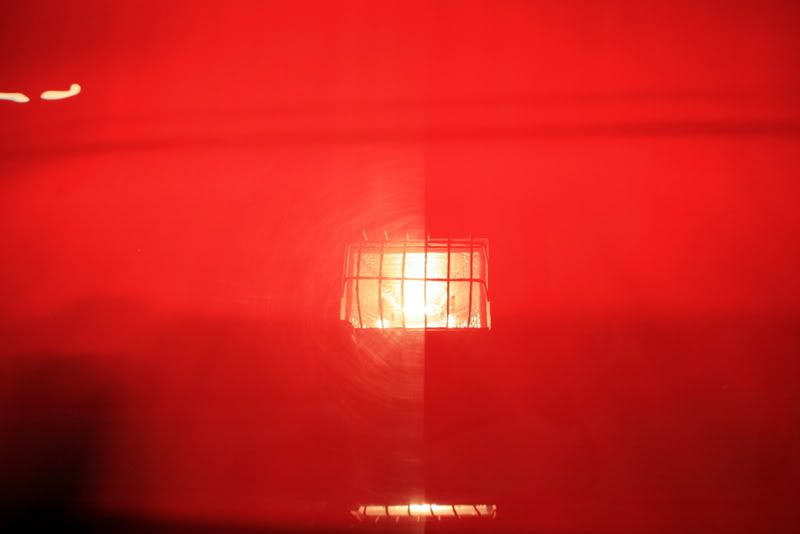
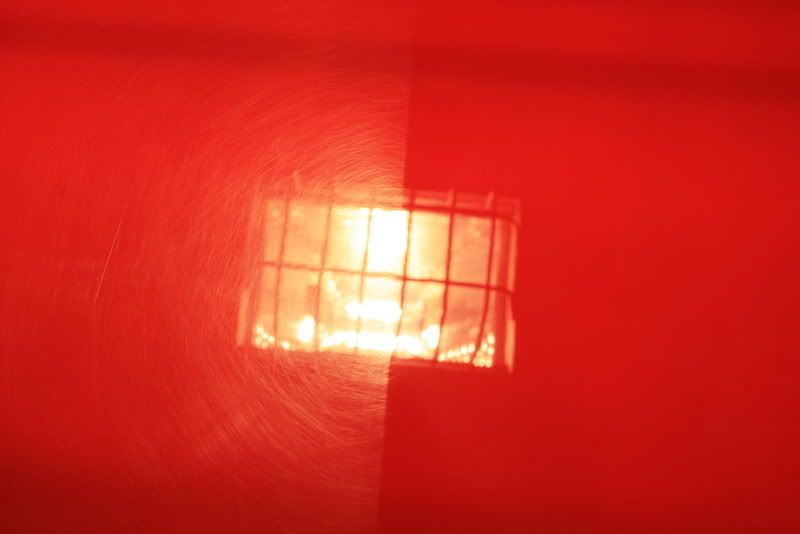
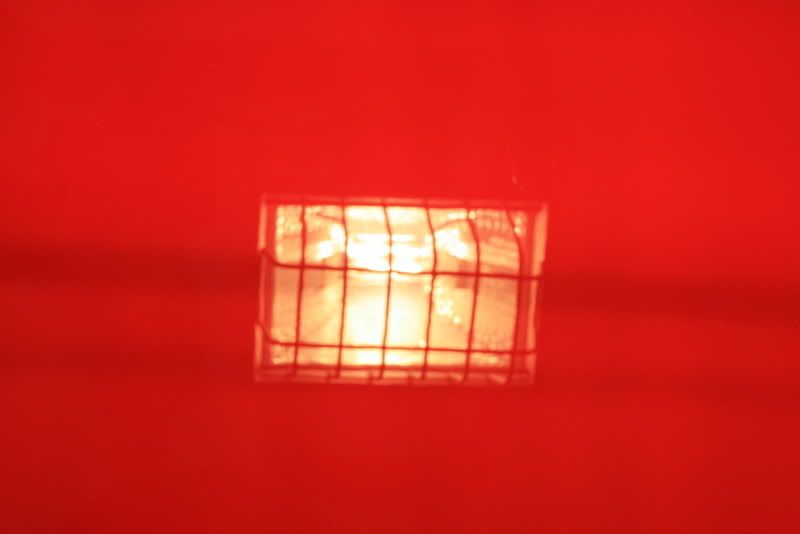
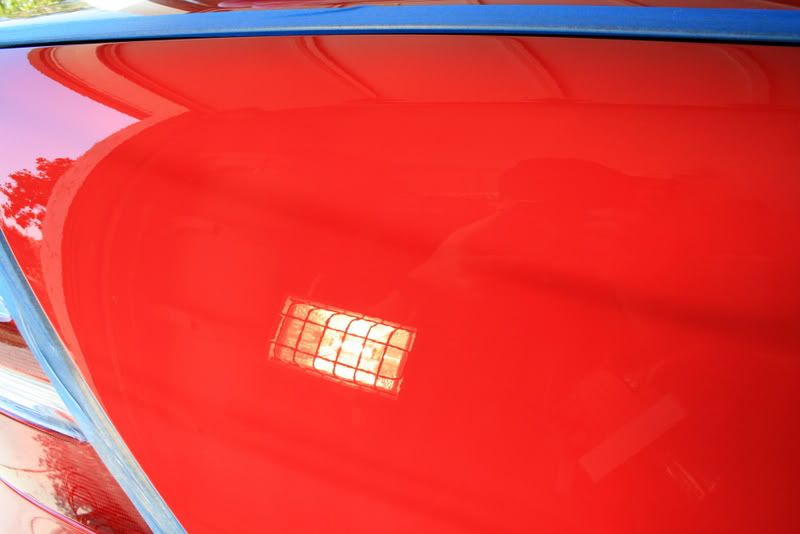
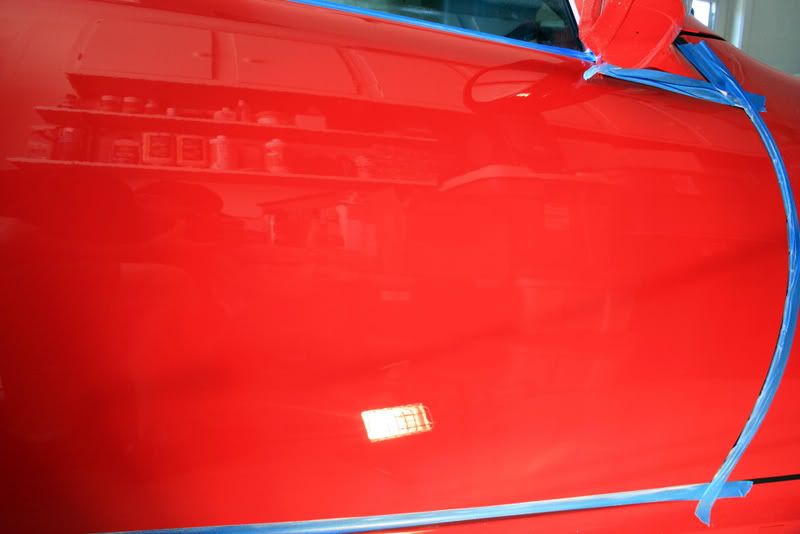
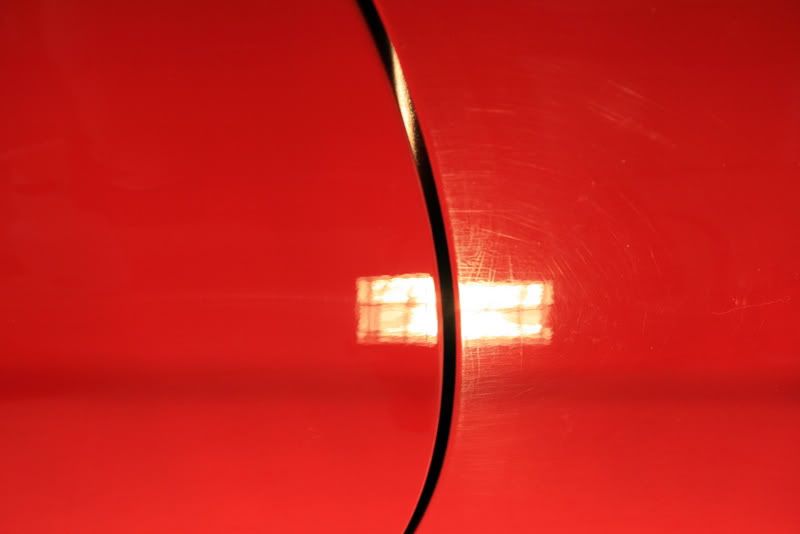
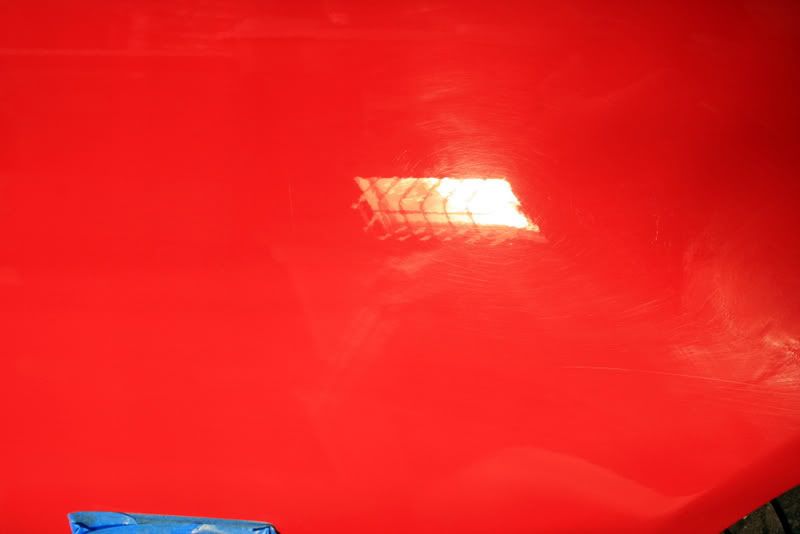
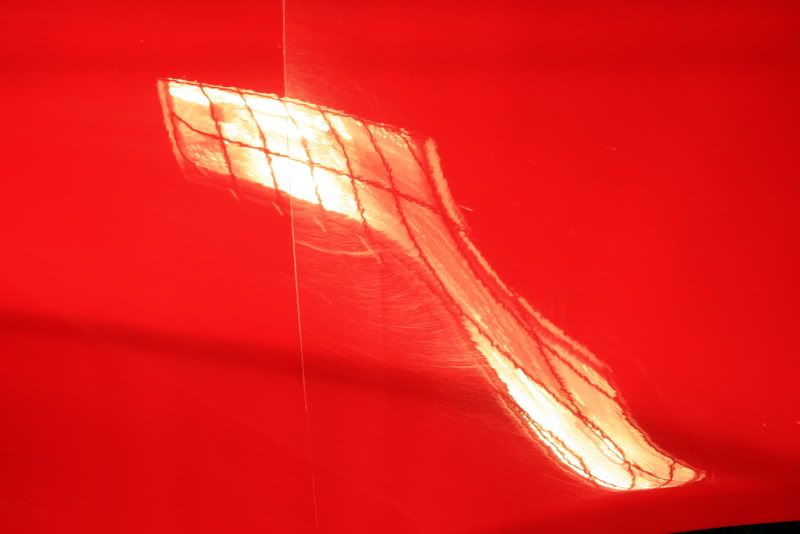
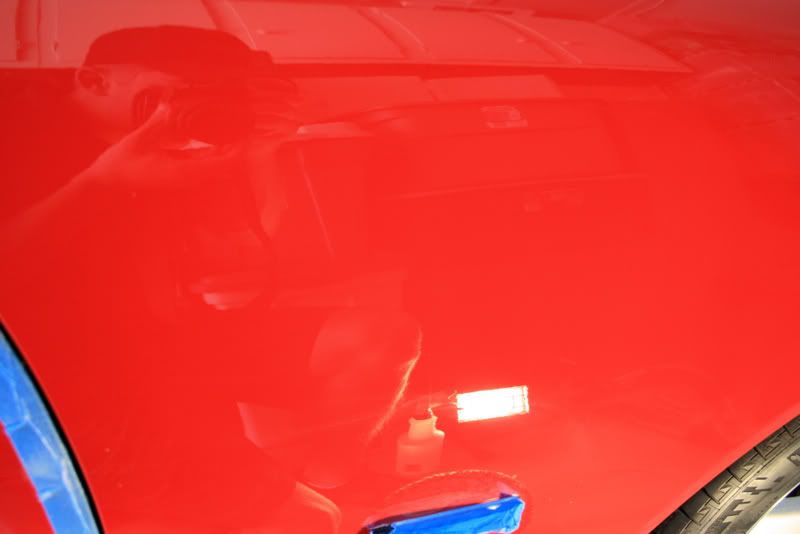
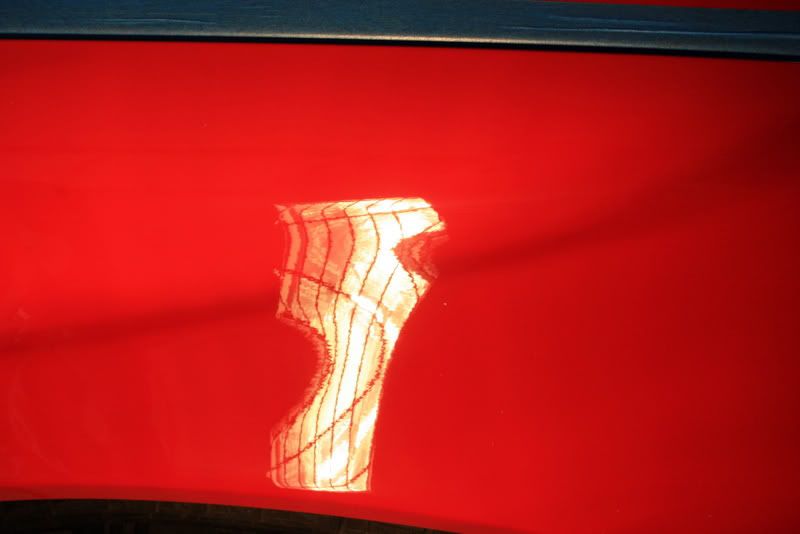
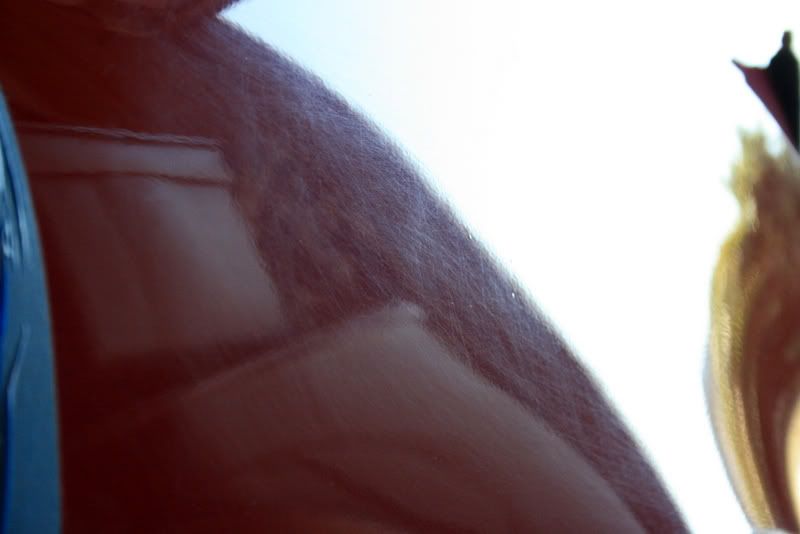
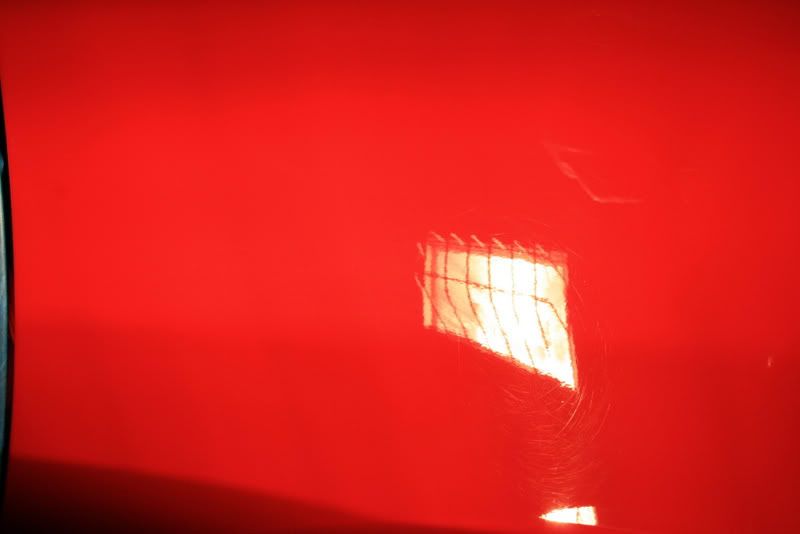
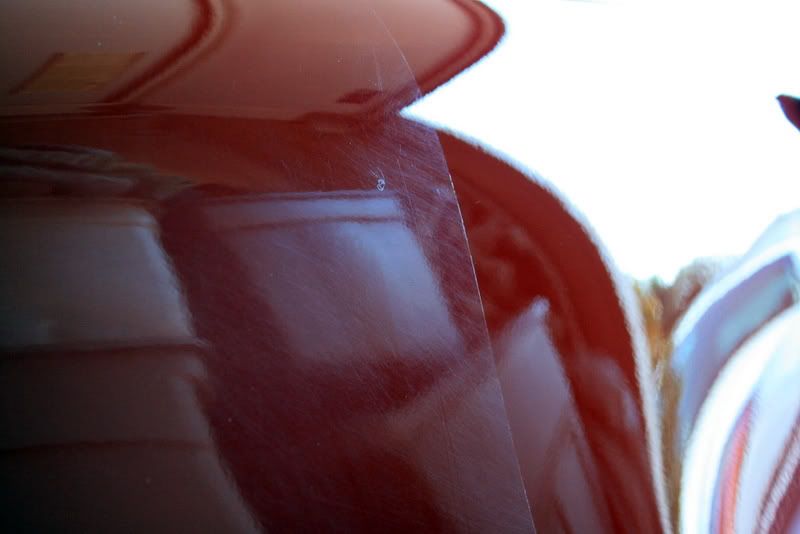
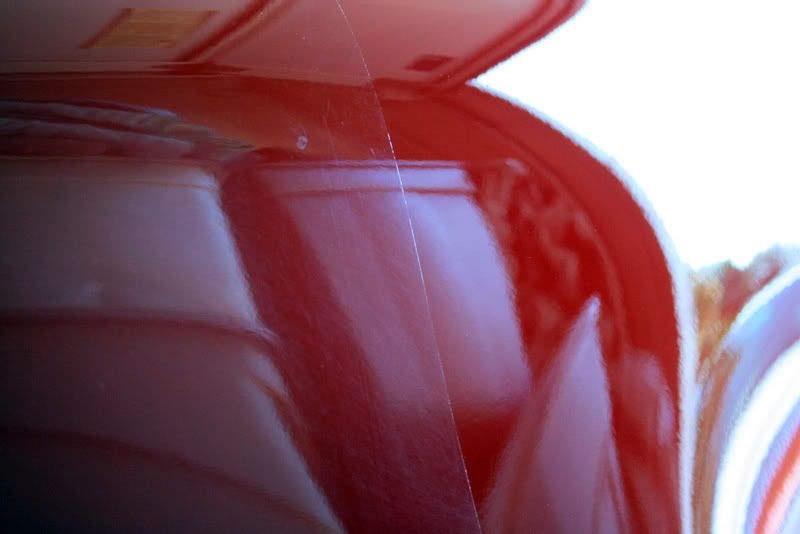
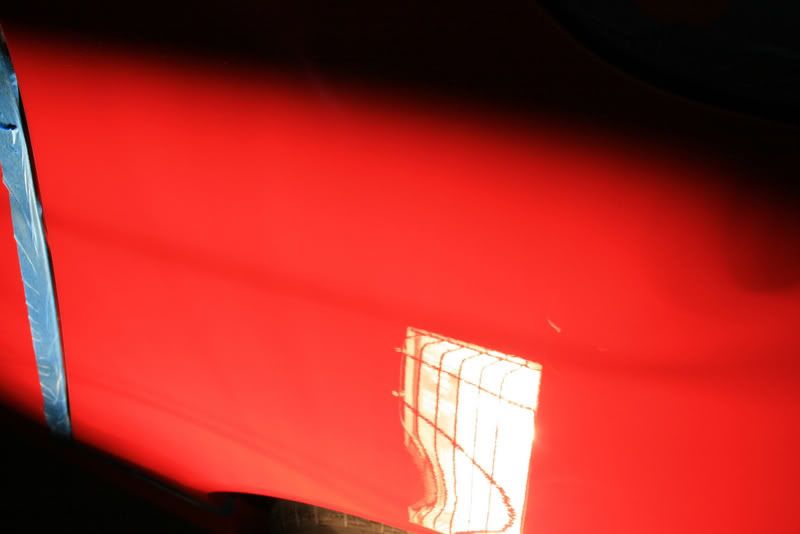
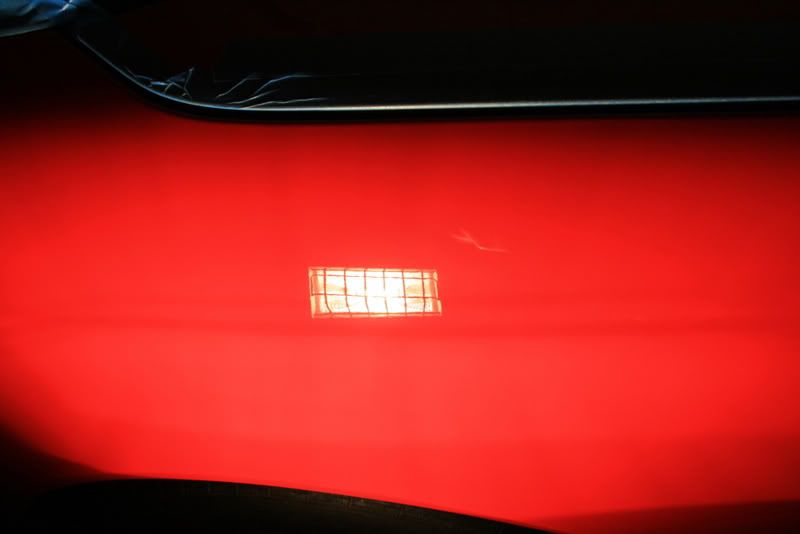
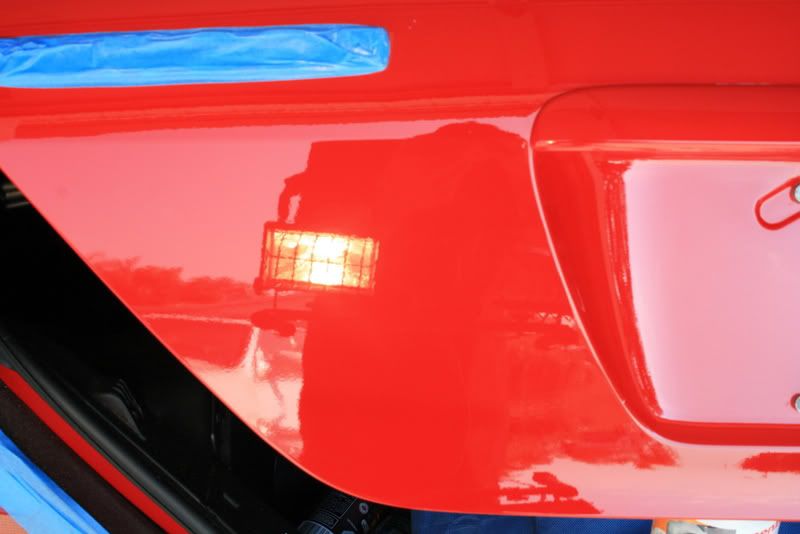
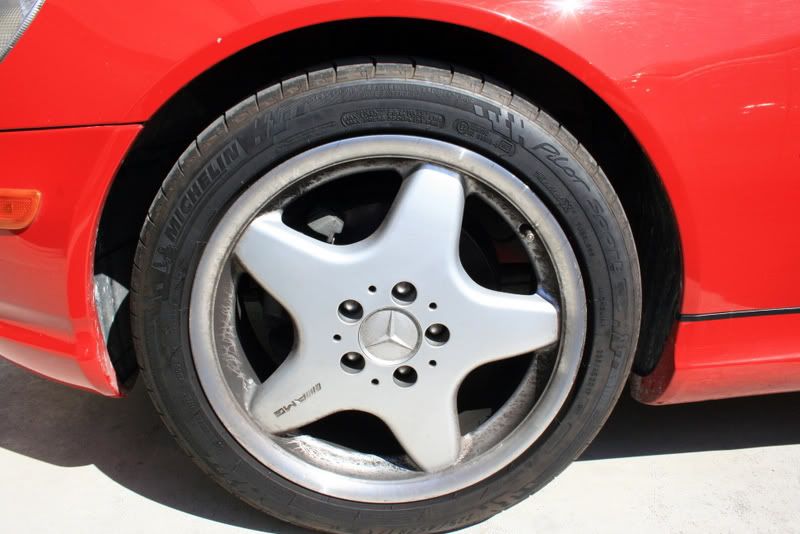
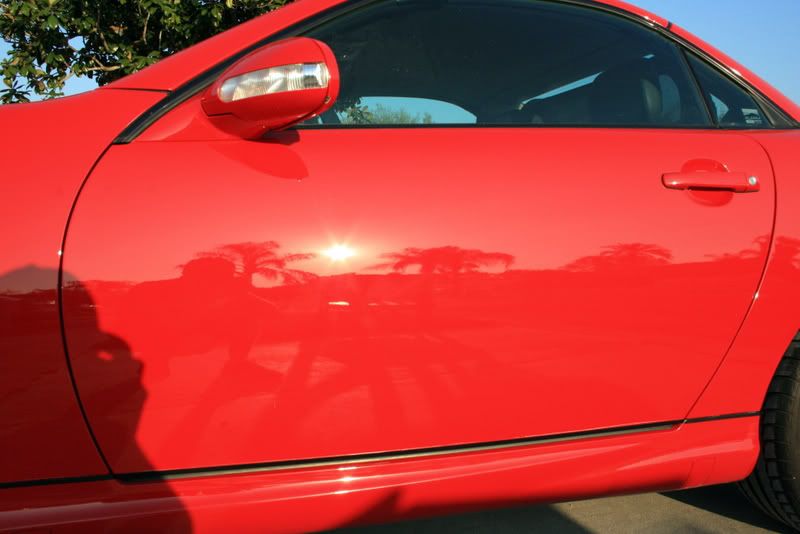
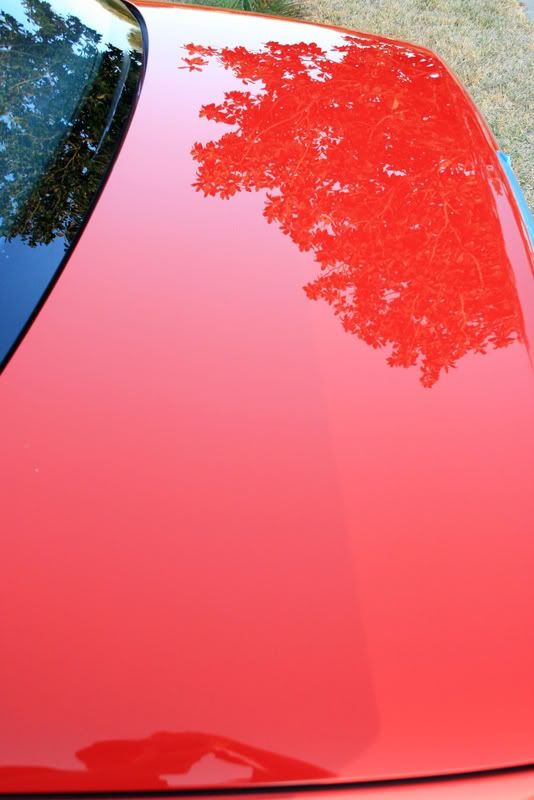
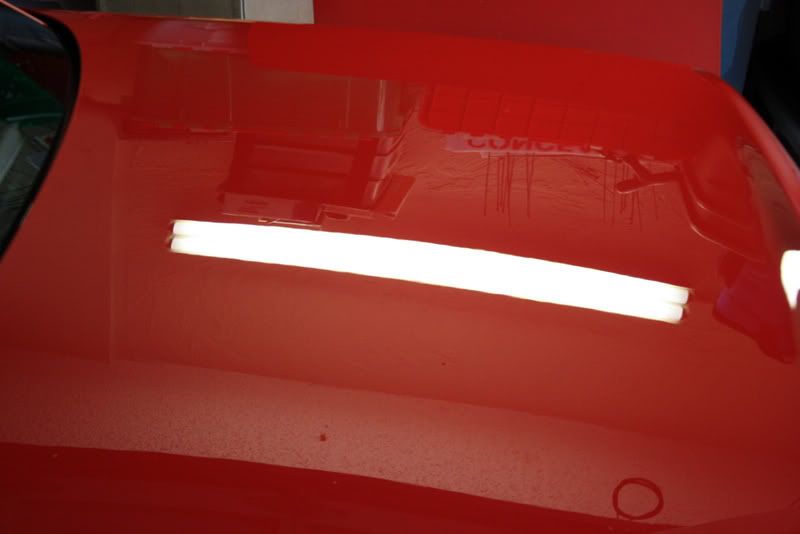
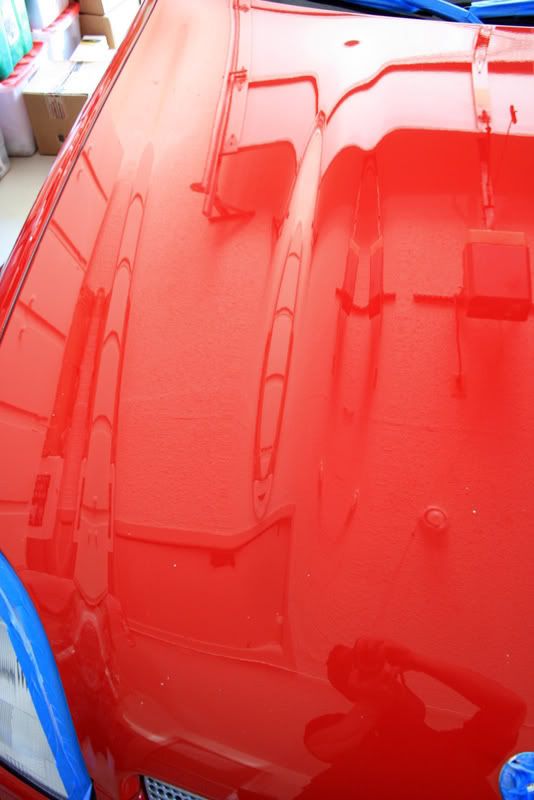
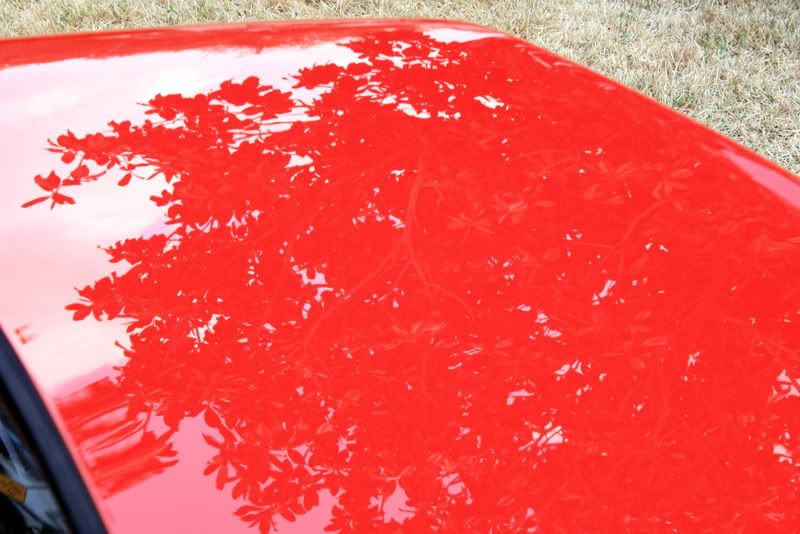
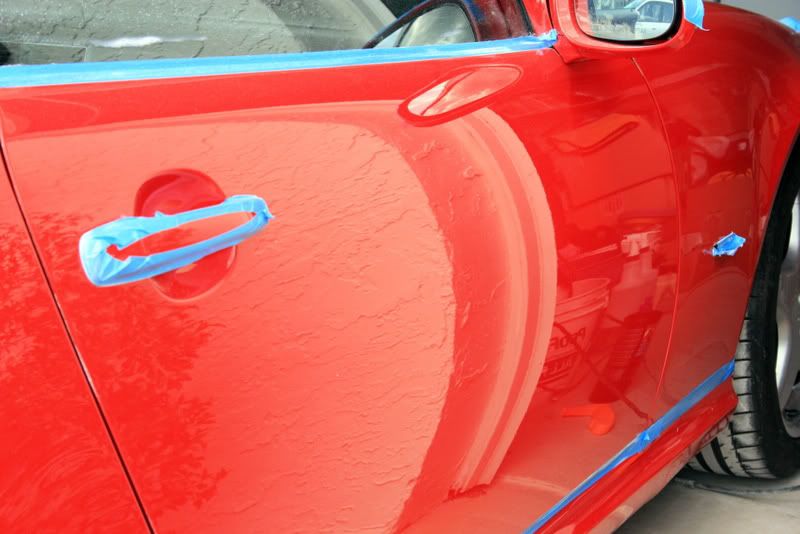
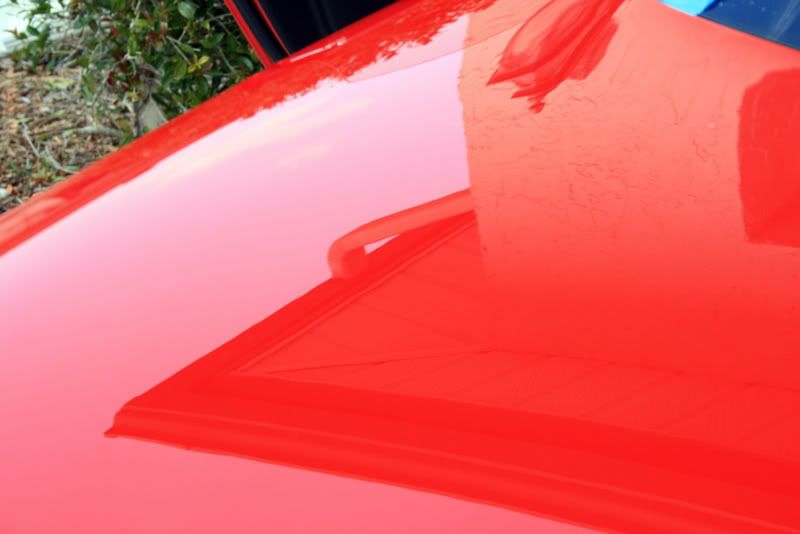
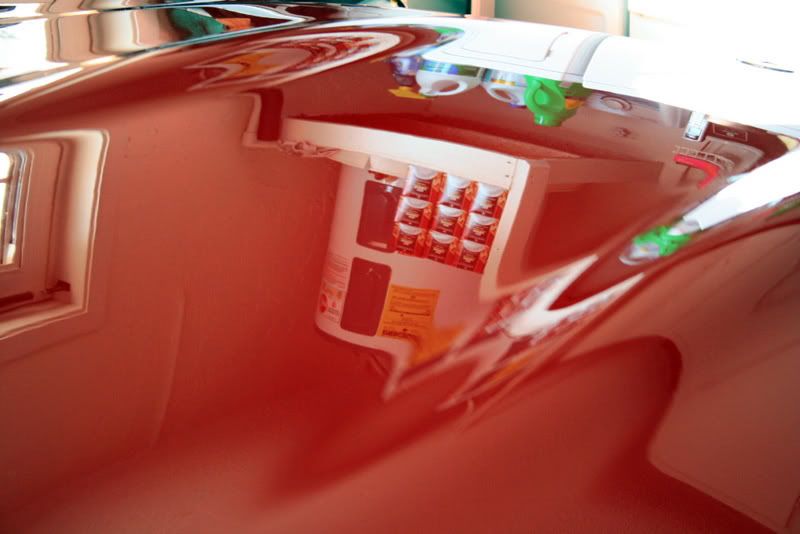
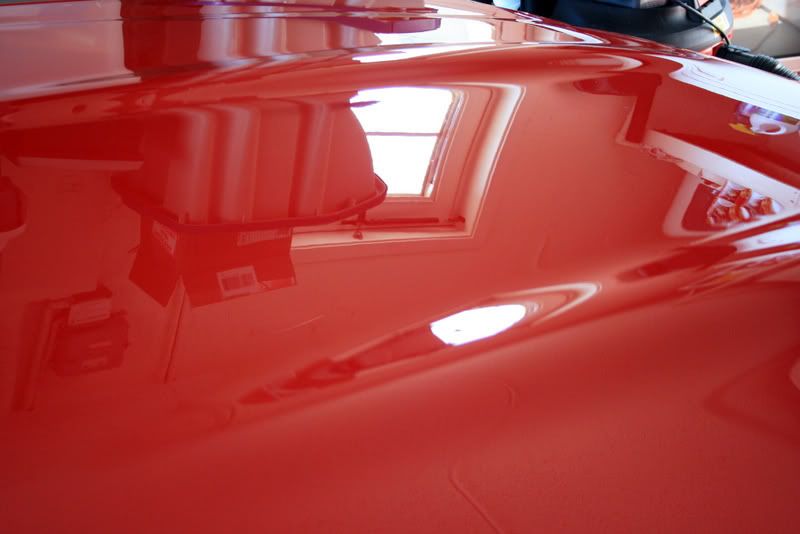
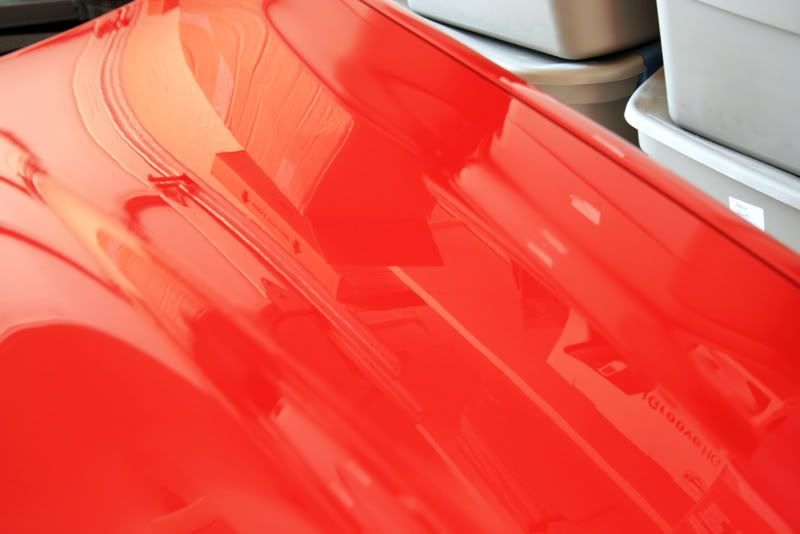
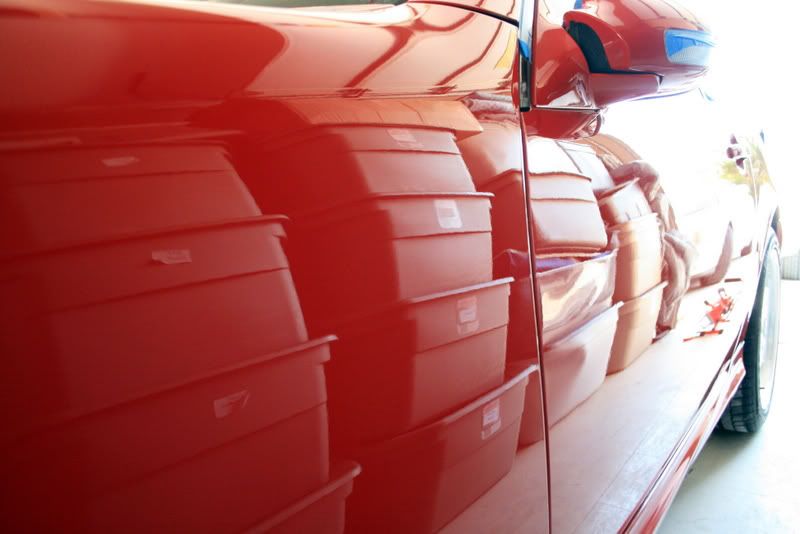
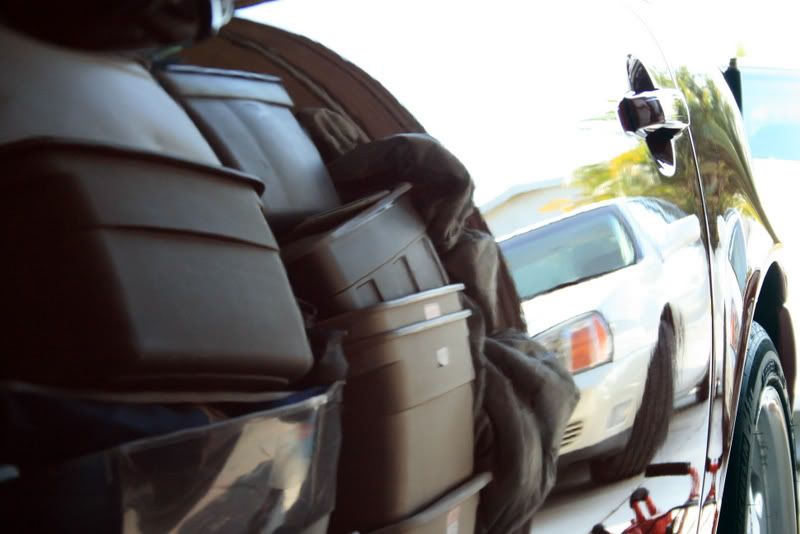
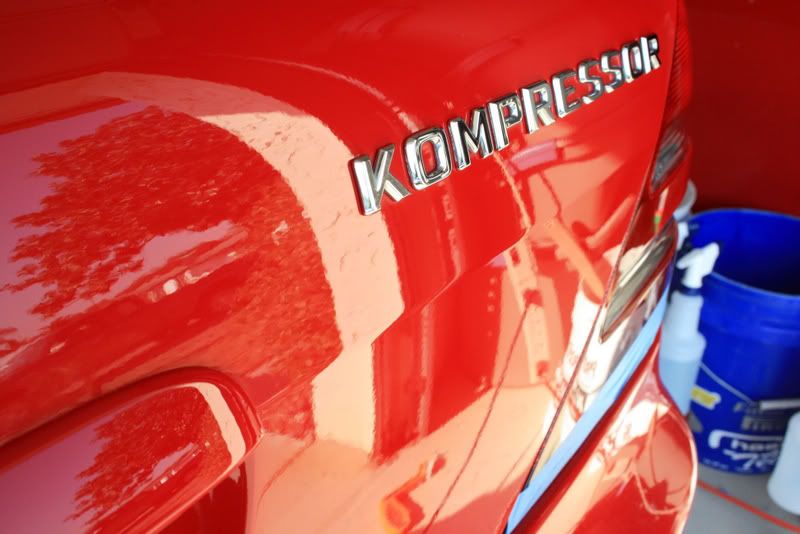
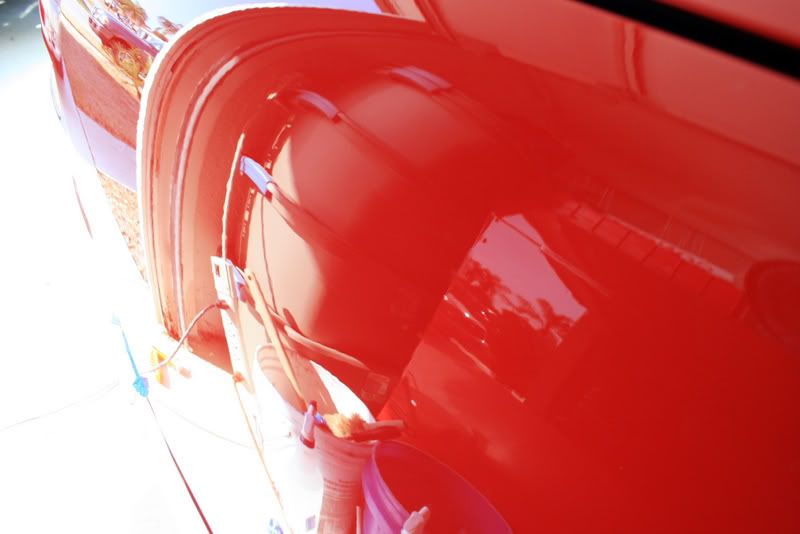
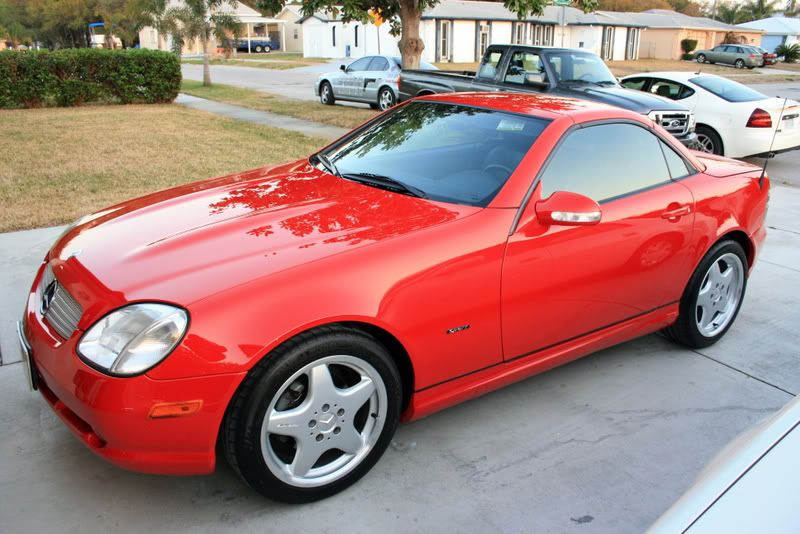
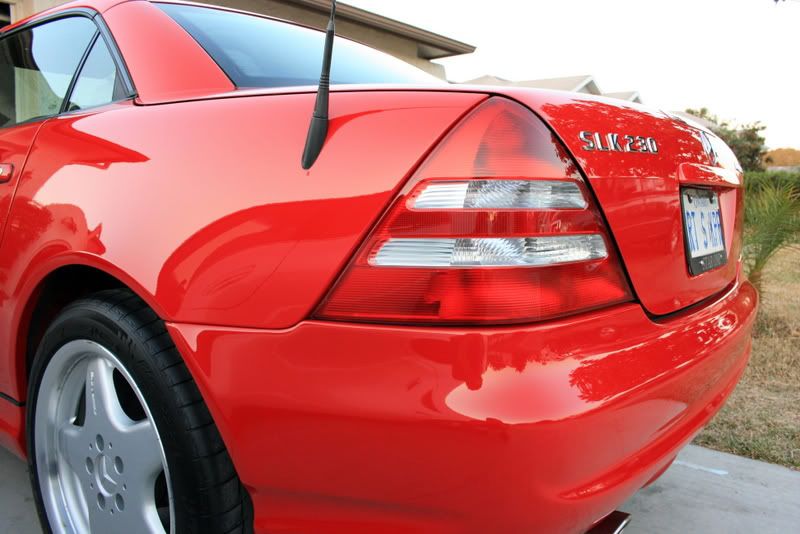
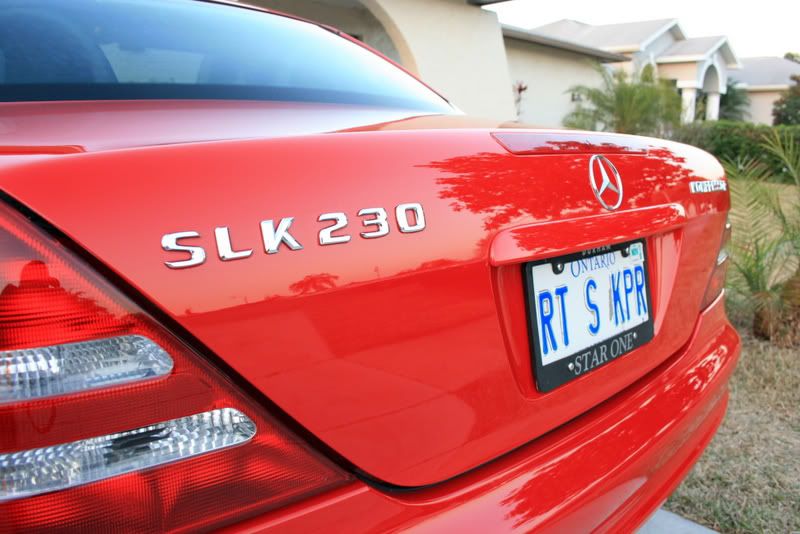
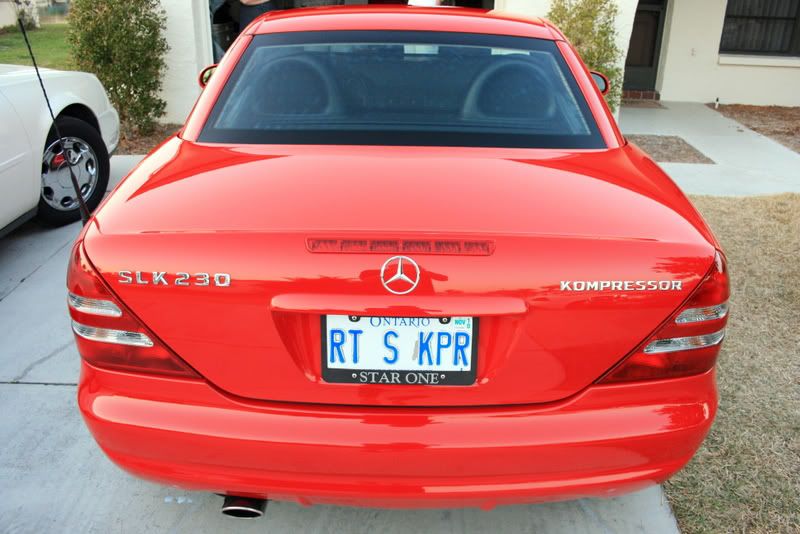
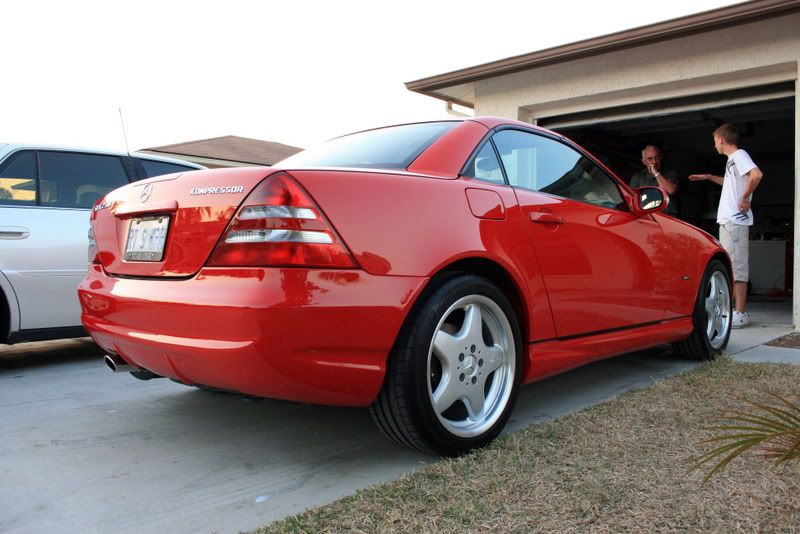
This is how the car looked when it arrived..I got this 2001 Mercedes SLK230 two days ago, and we'll just say it wasn't in great shape...AT ALL! In fact, the paint(specifically the trunk)was in probably the worse shape I had seen. I was only hoping and praying M105 would be able to tackle it even using the KB method.

IMG_8415.jpg


IMG_8386.jpg


IMG_8390.jpg


IMG_8391.jpg


IMG_8392.jpg


IMG_8393.jpg


IMG_8418.jpg


IMG_8423.jpg


IMG_8421.jpg


IMG_8416.jpg


IMG_8389.jpg


IMG_8414.jpg


IMG_8383.jpg


IMG_8384.jpg
 
:har: Im guessing at this point your asking yourself, THATS IT?!?


Well of course not! I saved the good ones for its own post! :dance


This is what I was working with on the trunk. Apparently the owner took some sort of "rocks in a bottle" compound by hand on a rag to try and remove some swirls, only putting some more MASSIVE swirls into the paint.

IMG_8385-1.jpg


IMG_8419.jpg


IMG_8387-1.jpg


IMG_8432-1.jpg


I never thought I was going to be able to correct this, and if I did I thought for sure there would be a significant amount of RIDS left over..WRONG.


The first combination I tried was M105 on a Megs Solo Yellow Wool using the instructions given to me by Kevin months ago. Just to avoid the confusion:


Kevin Brown said:
Since you've already got the M105 and the wool pad (plus plenty of others)...


Go ahead and try this:


1. Prime the pad THOROUGHLY.

Rub it in with your hand. It'll take a bit more than you're used to applying.


2. Apply a bead of M105 to the surface, pull it in, and polish at low speed (1000 rpm)I actually used about 1200rpms with decent pressure for the first 1-2 passes, then slowed to 1000rpms and apply light to no pressure using the machines weight for the last 1-2 passes..

Try 2-3 passes, or until the M105 is just starting to dry.


3. Using a fine mist, spray the surface with water.

Do not add additional product- Just re-polish with what's already in the pad.


I think you'll see a 50% improvement in the cut, but you'll probably see an increase in swirling (it can be easily removed).


After trying this method (count it as one cycle), spur the wool pad (blow it clean with compressed air if you have it).


I won't PROMISE a better result, but I am pretty sure you're going to GET a better result.


Even in my first pass, I removed MOST of the heavy swirling but there were some RIDS still visible.

IMG_8431-1.jpg


I then decided to step it up to the Megs Solo Burgandy Wool just to see if the left over swirls were worth the chase. To my surprise, they were nearly COMPLETELY removed. After TWO passes with this combination, I got what I was looking for. PERFECTION!


These pictures were taken directly after M105/Burgandy Wool. There was no middle or finishing steps taken.

IMG_8436-1.jpg


IMG_8437.jpg


IMG_8440.jpg


IMG_8439.jpg


The same panel under the halogens..

IMG_8446.jpg


IMG_8445.jpg


IMG_8444.jpg
 
I then moved on to the rest of the car, the other panels weren't nearly as bad as the trunk, but there were still some pretty deep defects throughout requiring two passes still.


Note. These pictures were all taken directly after M105/Wool, no finishing steps taken.


Passenger Rear 1/4 Panel.

IMG_8458.jpg


IMG_8459.jpg


Some very deep defects on the passenger door.

IMG_8461.jpg


50/50 after M105/Wool. Here, you can notice a very faint hologram, but still not bad for how aggressive this product works!

IMG_8462.jpg


Same Door.

IMG_8463.jpg


IMG_8465.jpg


Door Corrected. Fender Not.

IMG_8467-1.jpg


Front Passenger Fender Uncorrected.

IMG_8468-1.jpg


50/50.

IMG_8470-1.jpg


Fully Corrected.

IMG_8469.jpg


IMG_8471.jpg
 
I then moved onto the hood, which wasnt in the best of shape either.

50/50.

IMG_8475.jpg


Corrected.

IMG_8476.jpg


Besides the trunk, the next worst panel was the Drivers Rear 1/4 Panel. You can see even without any lighting just how swirled and hazy it is.

IMG_8483.jpg


A little closer inspection.

IMG_8484.jpg


After ONE pass with Burgandy Wool/M105. You can still see some deeper RIDS left over.

IMG_8494.jpg


50/50.

IMG_8488.jpg


IMG_8489.jpg


Now after TWO passes. Fully Corrected. Sorry about the fiber on the lense.

IMG_8495.jpg


IMG_8496.jpg


IMG_8497.jpg


IMG_8498.jpg
 
I removed the license plate so I could fully polish the entire trunk. Of course I cleaned up the mess from under the plates before polishing! :nana:

IMG_8503.jpg


Uncorrected.

IMG_8504.jpg


The trunk only required 1 pass be made with the burgandy wool/105.

IMG_8505.jpg


Here, you can see what my Menzerna bottles are getting used for these days. :nervous:

IMG_8506.jpg


A shot of M105 after polishing, ready for wipe-off.

IMG_8499.jpg


I forgot to add befores of the wheels, so Ill throw them in here before the final shots! :heelclick

IMG_8417.jpg


IMG_8424.jpg


IMG_8420.jpg
 
All i can say is WOW!! That is really some incredible work, i cant wait for this to be fully released..looks like you are hyping it up even more with your work! Im interested in how it will work with the flex 3401 as well!
 
jordanrossbell said:
All i can say is WOW!! That is really some incredible work, i cant wait for this to be fully released..looks like you are hyping it up even more with your work! Im interested in how it will work with the flex 3401 as well!


From what I have been seeing around the boards, is that the FLEX is a great tool with this method, however a lot of people are worried about the stress it puts on the machine. I dont have any personal experience with that particular machine though.
 
Yeah i have attributed my rashed backing plate to uneven pressure..im worried to lay some on it..sad but its fragile if working smoothly haha...seriously i feel like any pressure negatively affects the BP
 
The car looks absolutely incredible now. Great Job!


Couple of questions though...


Can you lay out what exactly it is you do to prime the pad with M105 before you work it?


Also, what version of M105 are you using? I have the old version and am wondering if the KBM will be as effective with the old version as it is with the new version.
 
drumset11 said:
The car looks absolutely incredible now. Great Job!


Couple of questions though...


Can you lay out what exactly it is you do to prime the pad with M105 before you work it?


Also, what version of M105 are you using? I have the old version and am wondering if the KBM will be as effective with the old version as it is with the new version.


Follow this link and scroll down..this post is a bit outdated now, but same thing applies pretty much. I am using the old version of M105 btw, havent tried the new yet...

Priming a Pad - Car Care Forums: Meguiar's Online
 
Wow, what an amazing turnaround!!


Great work!! :2thumbs:


Question: Did you happen to do any alcohol wipedowns after polishing??


I'm not questioning your final results, but M105 and almost every other compound I have ever used will *fill* and mask any remaining defects if you do not do an alcohol wipedown.


Like I said, I'm not questioning your work at all, but I didn't see you mention this in the write-up and I think it is a very important step. Rydawg and I have worked on a lot of cars together and have seen various compounds mask defects. Sometimes even a 50/50 water alcohol will not reveal the true results. We have found that 91% alcohol works the best, although it is not recommended on some softer paints.


Either way, the car looks absolutely amazing!! The owner must have been floored...
 
First - great job the tirn around is incredible.


Am I reading correctly, his is the process you used to polish?


1. Prime the pad THOROUGHLY.

Rub it in with your hand. It'll take a bit more than you're used to applying.


2. Apply a bead of M105 to the surface, pull it in, and polish at low speed (1000 rpm).

Try 2-3 passes, or until the M105 is just starting to dry.


3. Using a fine mist, spray the surface with water.

Do not add additional product- Just re-polish with what's already in the pad.


I think you'll see a 50% improvement in the cut, but you'll probably see an increase in swirling (it can be easily removed).


After trying this method (count it as one cycle), spur the wool pad (blow it clean with compressed air if you have it).


Do you believe that you saved time on the paint on this one over your previous polishing process?
 
Back
Top